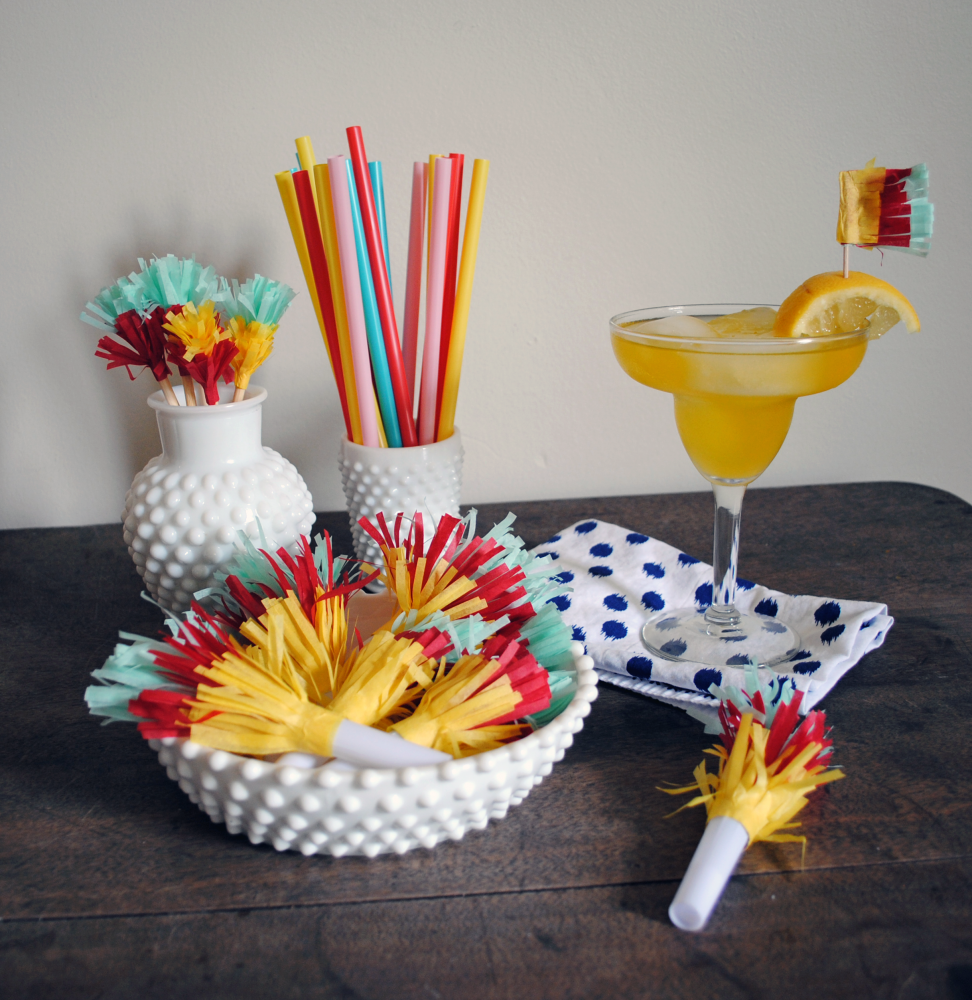
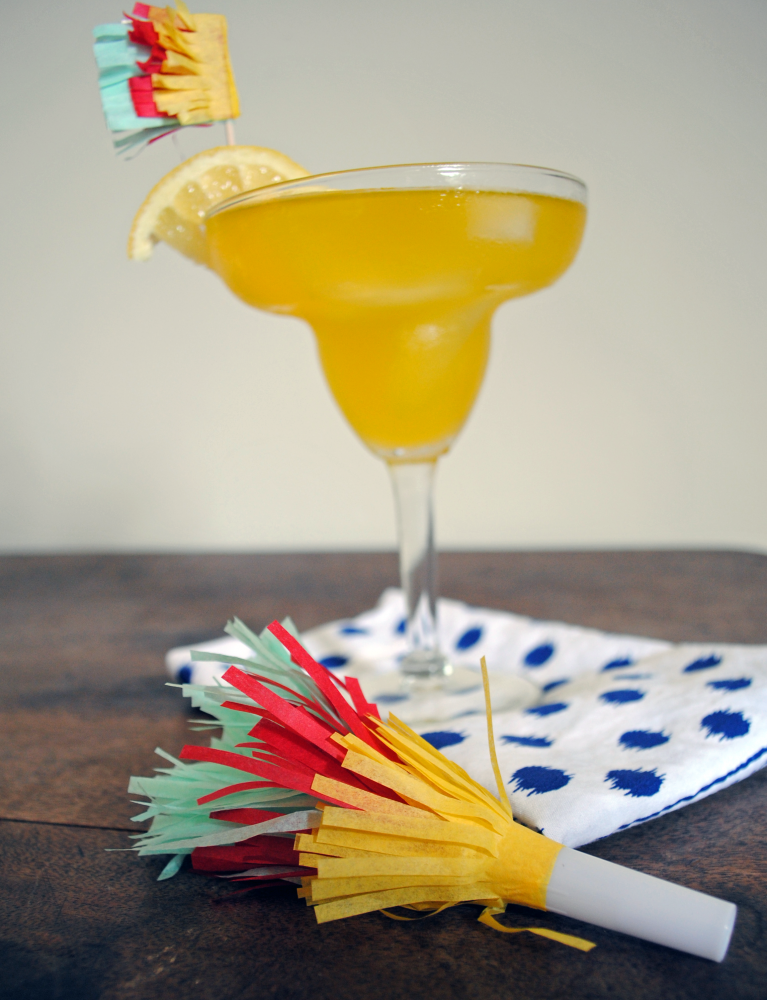
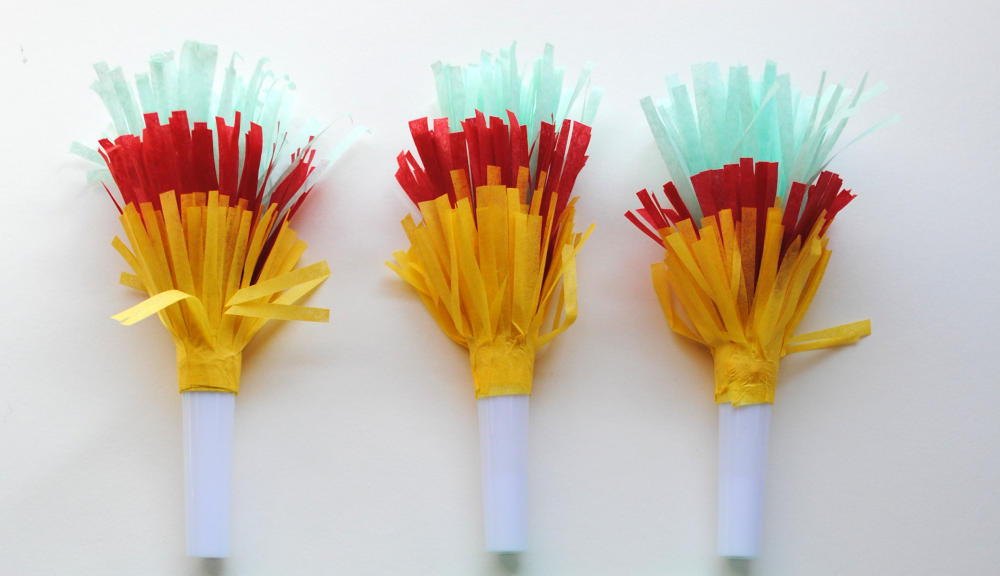
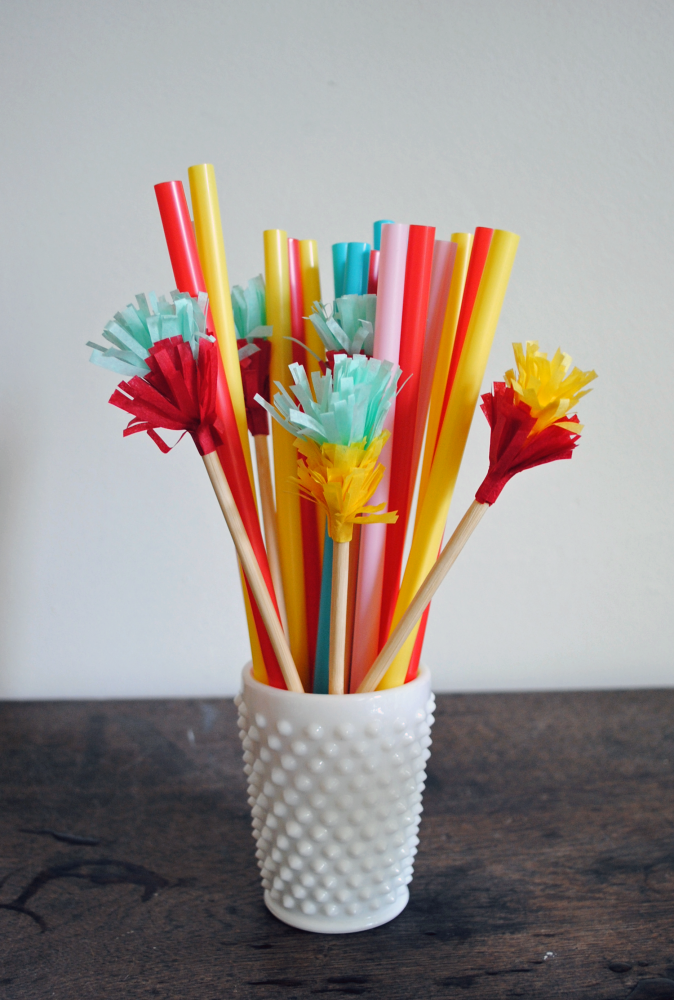
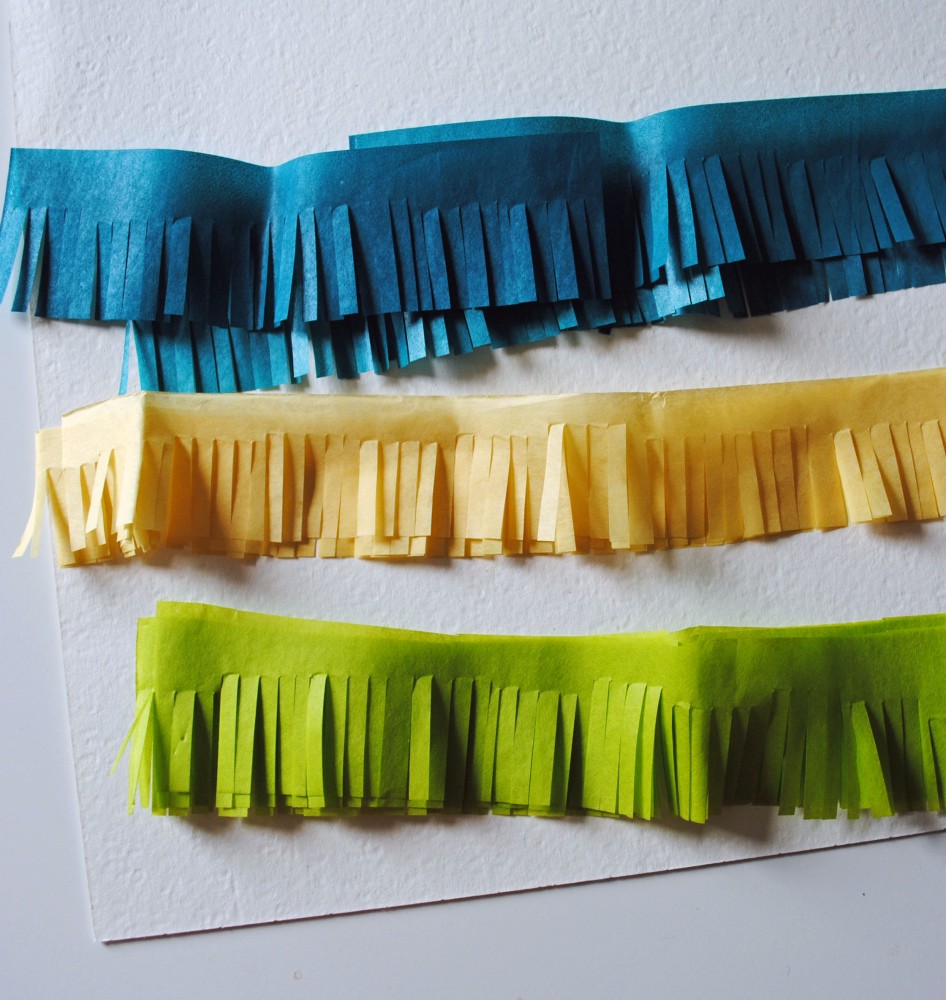
If you follow me on instagram, you may have seen my little brother graduated from high school this week (cue the tears!). He’s the baby in the family, and is lucky to have two big sisters and a mom that L-O-V-E -love throwing parties, so you better believe we’re going to be throwing the biggest and best graduation party for him to celebrate. He requested a taco bar which lead to an obvious theme of fiesta! — so I’ve been busy crafting up piñata-inspired details this week to make sure it’s a fiesta to remember. Using tissue paper, I cut 1.5 inch strips in different colors and used fringe scissors to create the piñata-like texture. Next, I used a glue-stick to coat the non-fringed edge, and began to wrap it around the party horn whistle (I got these at a party store and removed the paper wrappers that came on them). Keep wrapping until you get to the end and add a little extra glue to ensure it’s sealed, then repeat with additional colors layered on top. I replicated the same process for drink stirrers, just wrapping a bit tighter around a small skewer, and used a few extra tiny scraps to make some tooth-pick flags for garnishes; can’t wait to use these at the party this weekend!
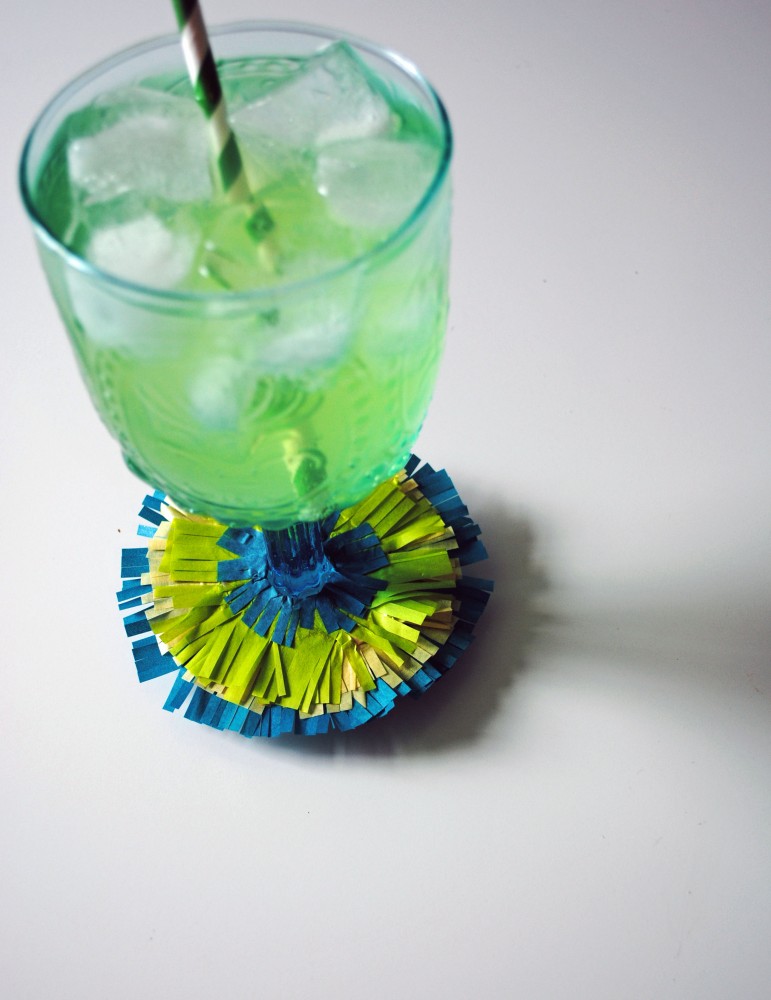
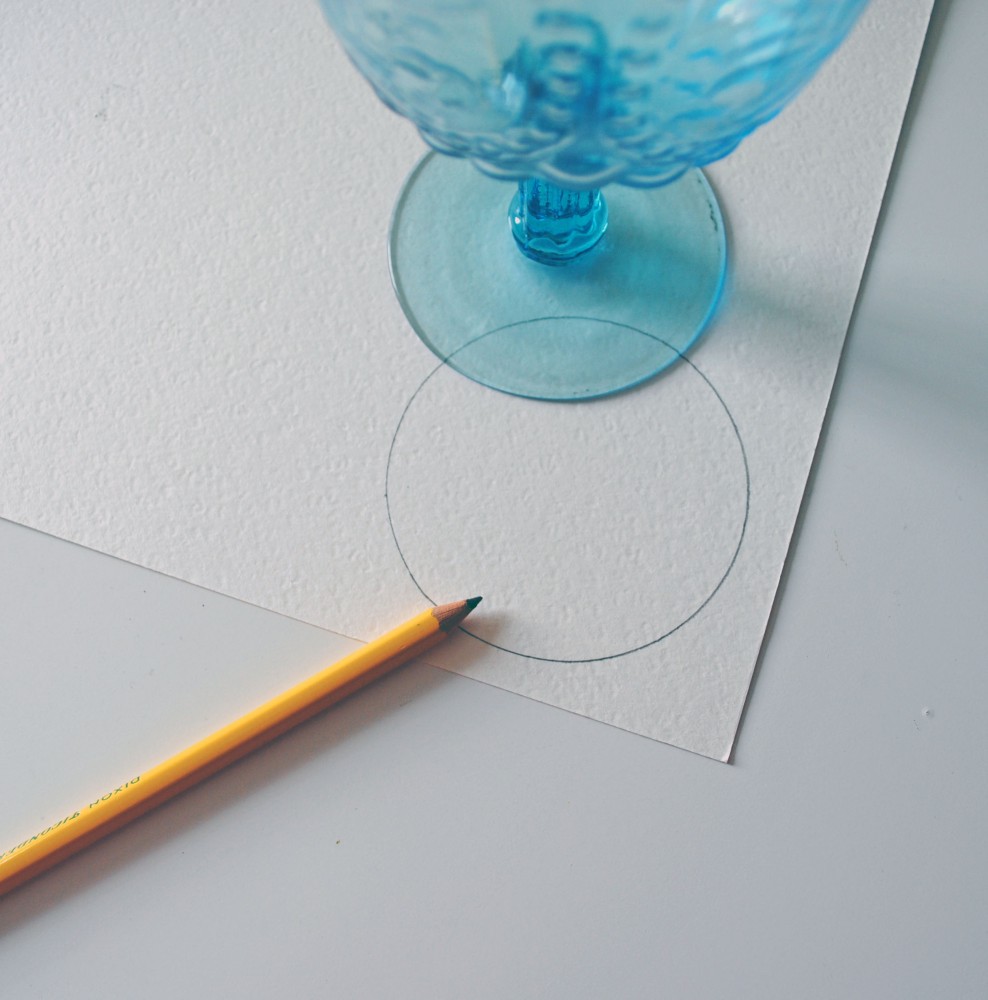
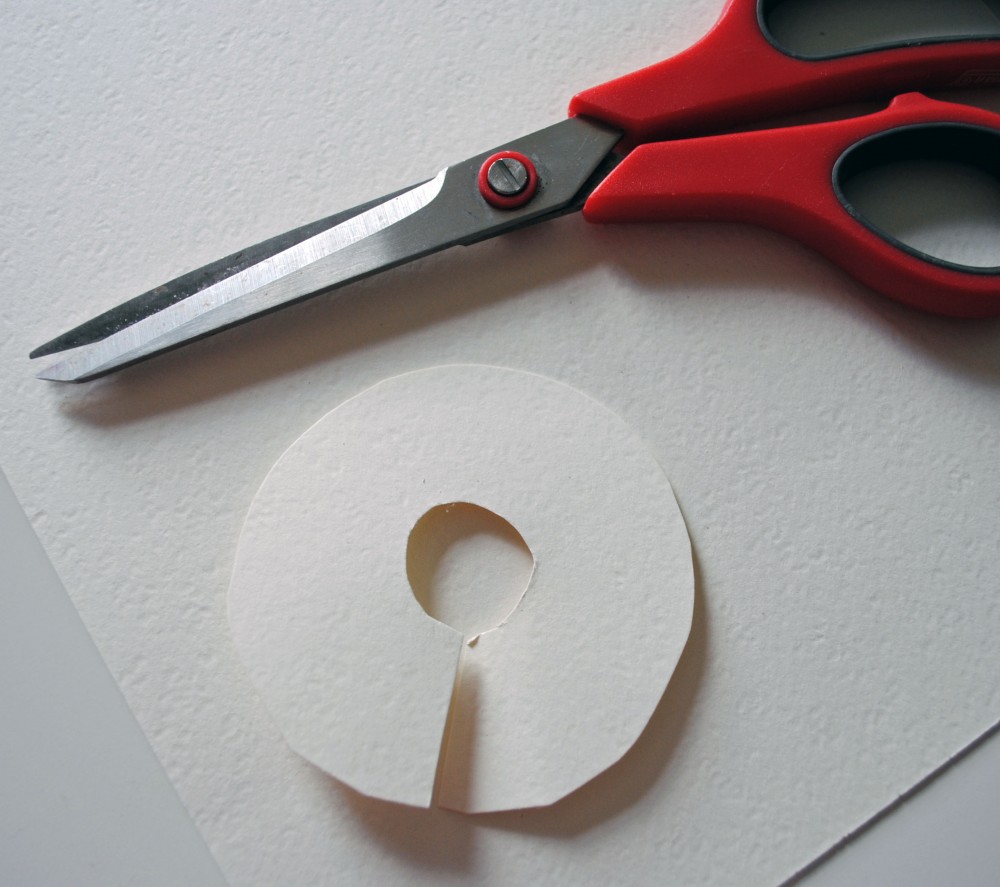
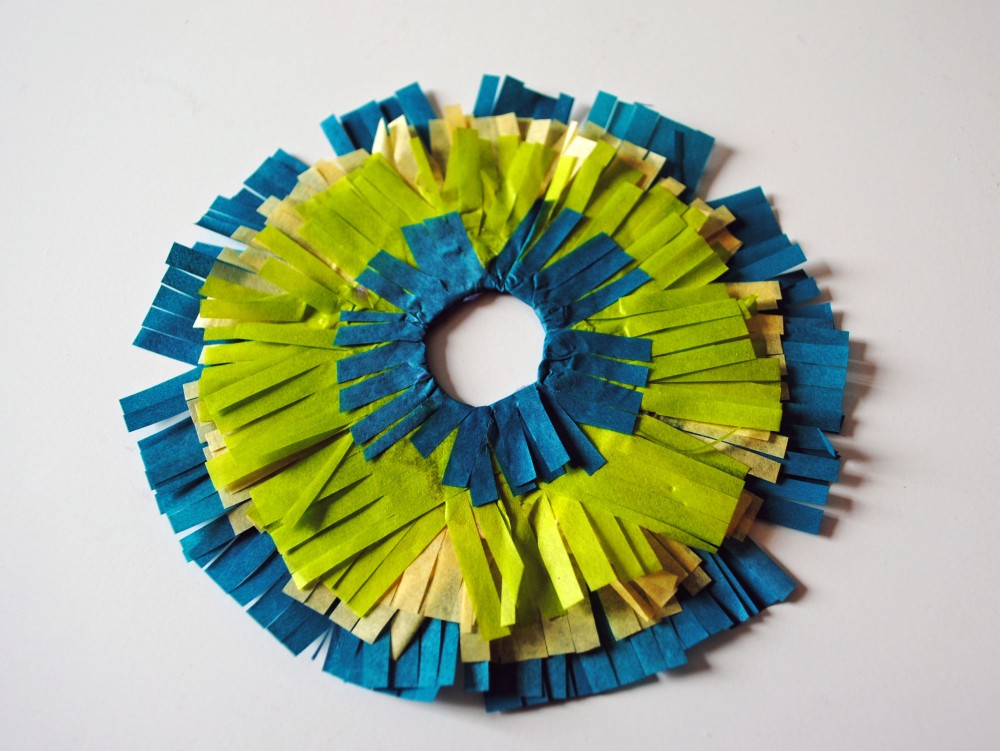
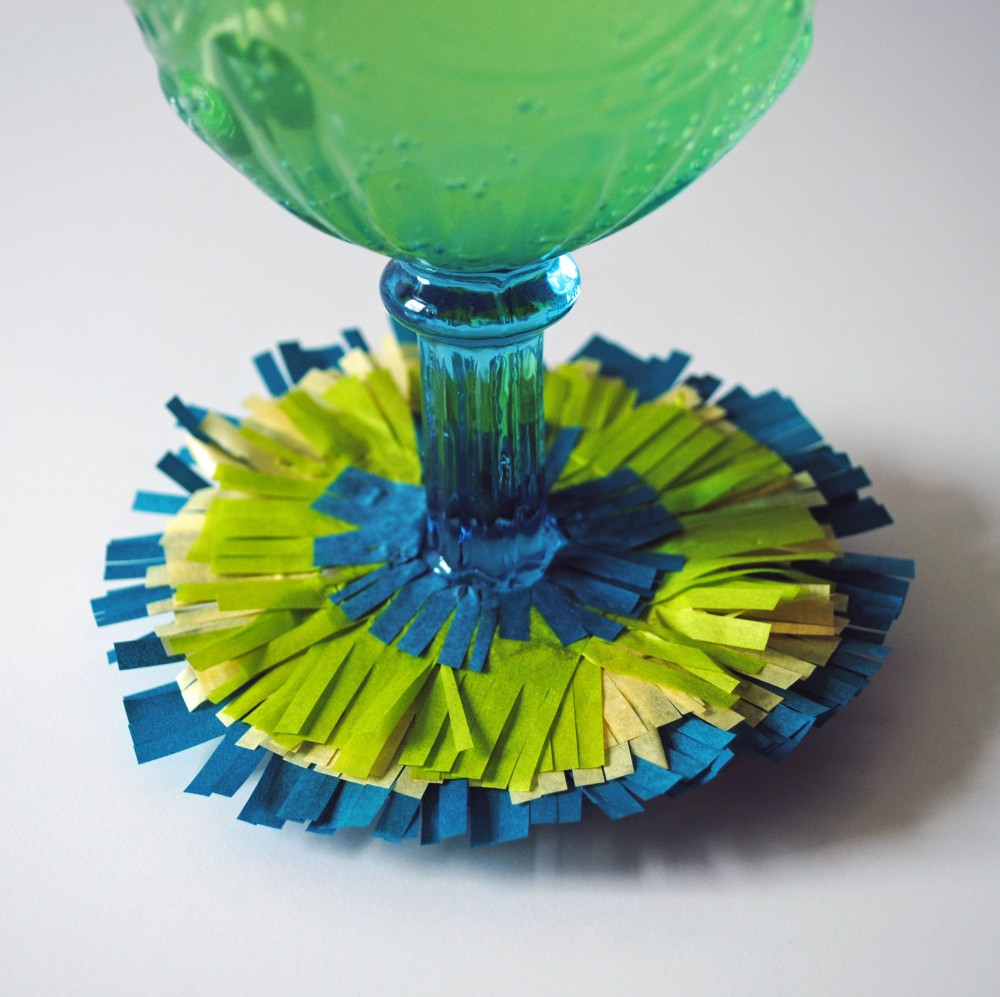
There is no better day than Cinco de Mayo to add a little extra flair to your cocktail, am I right? Which is why I made some pinata-inspired drink markers for our margaritas this year. Here’s how you make them: first, trace the bottom of your margaritas glasses on a piece of card-stock and cut out the circle. Then cut into the center of the circle about halfway, and cut out a smaller circle a little bigger than the circumference of the glass stem. Using strips of colored tissue paper, use fringe scissors to cut fringe. Cover the card-stock circle with glue and then start to wrap the fringed tissue paper around the outside. Repeat and layer on each new color until you’ve covered the full circle, and tuck the ends of the inner layer underneath the center circle to finish. Then slip your little pinata-inspired drink marker on to the bottom of your margarita and get ready to fiesta (think about making them in different colors to help your party guests identify their drinks!).
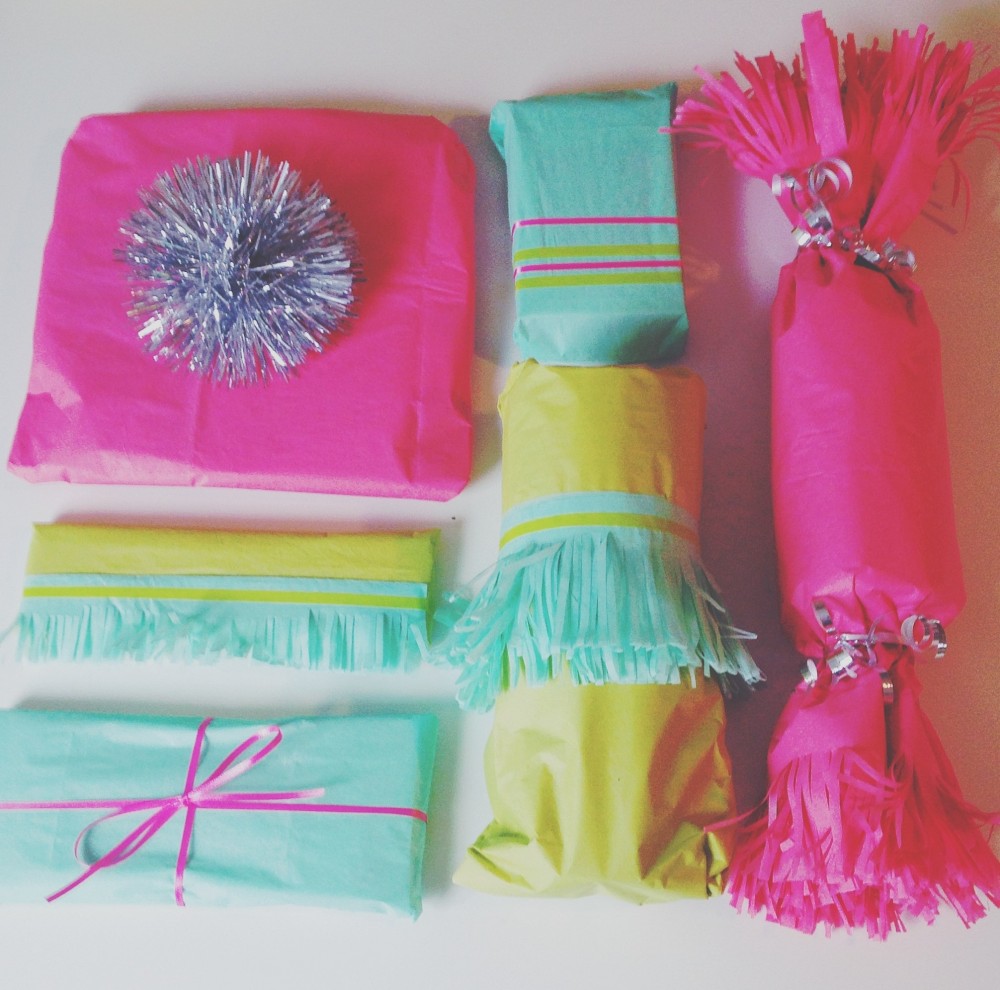
My little sister is born on Cinco De Mayo, so fiesta is a bit of an eternal theme for her birthday celebrations. I sadly can’t make her party this weekend so I decided to send a little fiesta in my place with some festive wrapping. I used fringe scissors, washi tape, and ribbons to give them an extra special treatment — and I think it’s official: I won’t be able to wrap a present without fringe ever again!
Today I’m going to be sharing the fourth and final of my CREATE COUTURE: The DIY Blogger Challenge tutorials, the Studded Fringe Clutch.
If you like what you see, don’t forget to vote!
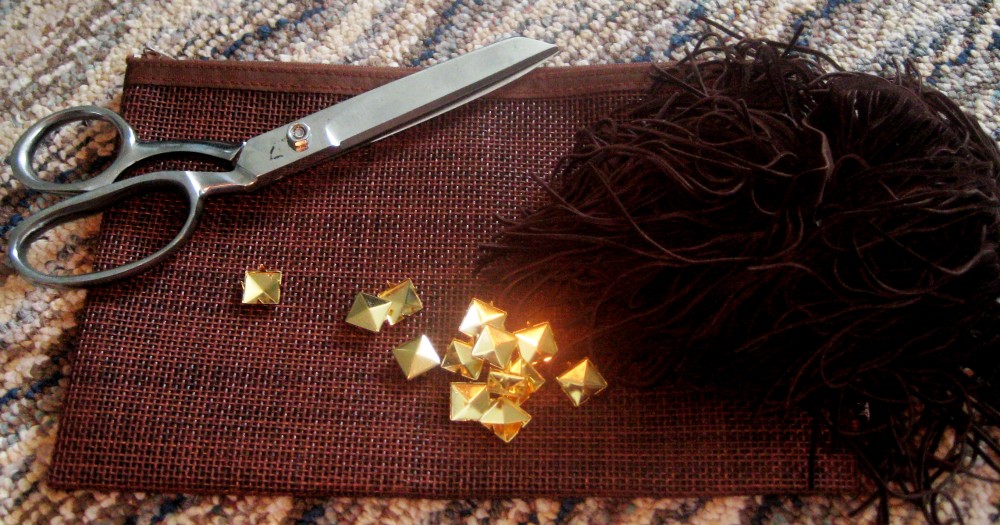
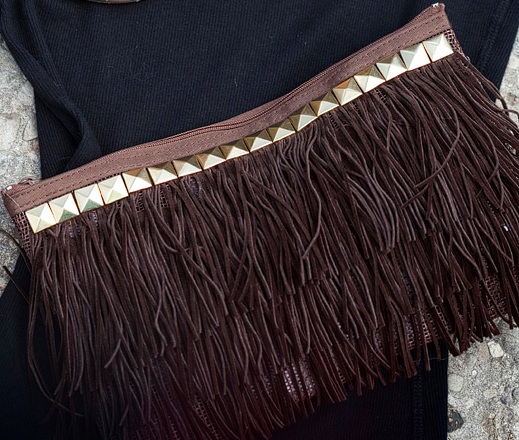 To make Studded Fringe Clutch you will need to first gather your materials. You will need: a hot glue gun, scissors, a pencil case (I found one in a perfect brown to match my fringe since it’s back-to-school season, and there is a large selection available right now), suedette fringe (the amount you need will depend on the pencil case you get, plan for a little over three-times the length of the pencil case), and about 20 XL pyramid studs (again, depending how big your pencil case is you may need more or less).
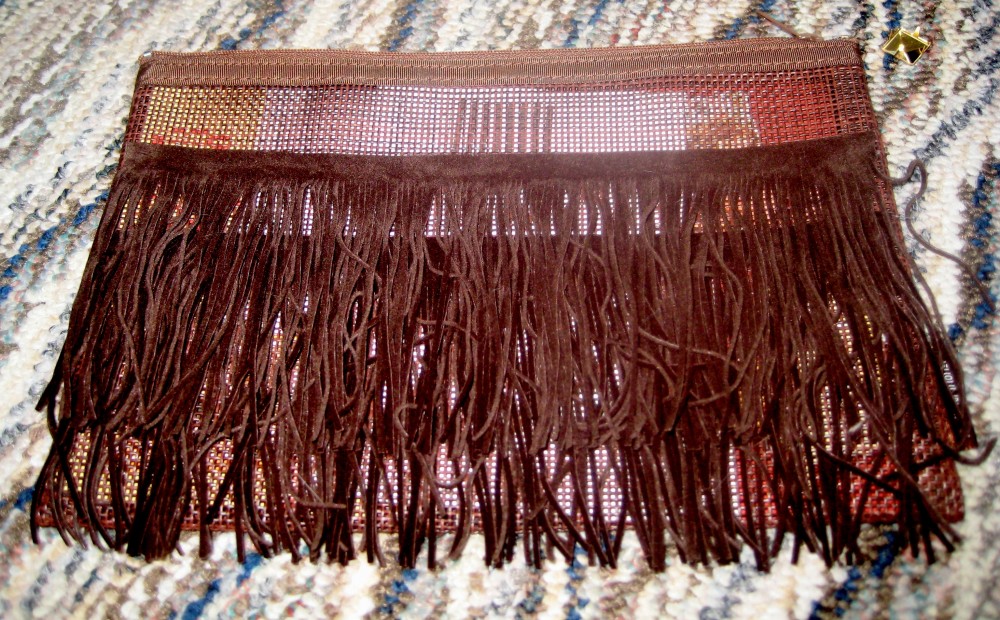
After you have all of your materials, take your fringe and measure it against the width of the pencil case. Use your scissors and cut a piece of the fringe to exactly the length of the pencil case. Then repeat this two more times so that you have three pieces of fringe trim that are the same length.
Next, line up the first piece of trim so that the bottom of the fringe is even with the bottom of the pencil case. Using your hot glue gun, lightly glue the top of the trim down to the pencil case. Wait a few seconds for the glue to set and then line up your second piece of trim so that the top of it sits halfway between the top of the first piece of trim and the top of the pencil case.
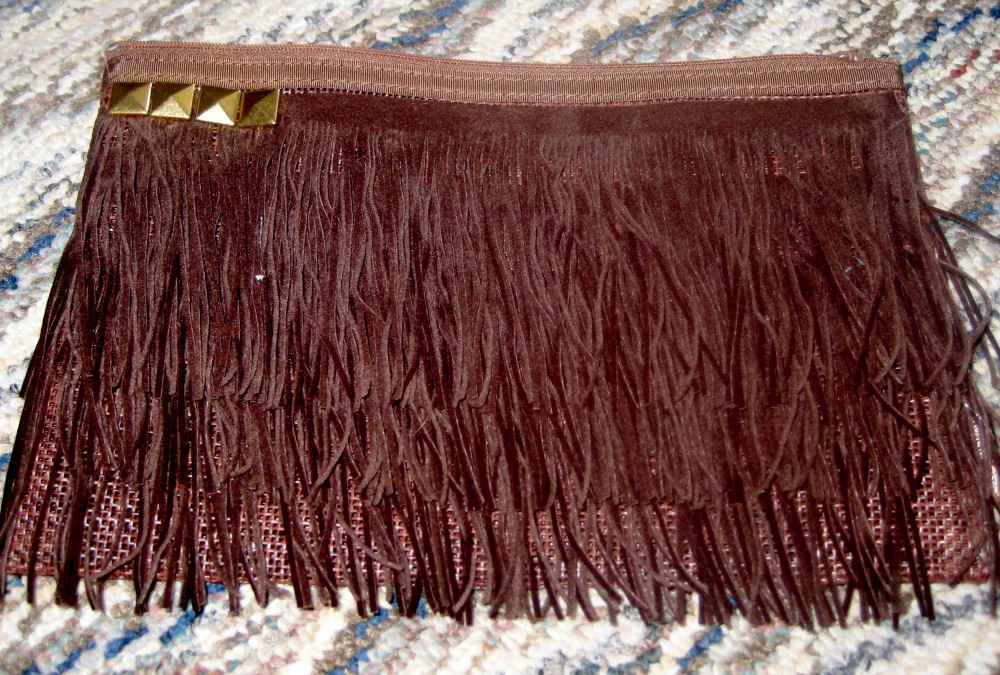
Finally, add the third piece of trim so it sits right under the top edge of the pencil case — make sure not to get hot glue too close to the zipper!
Now you’re ready to add the studs. Push the first stud through the material of your pencil case, making sure the stud lines up with the top edge. Make sure all prongs make it through the case and top layer of fringe, and then push the prongs of the stud back to lock them into place. They are soft enough to push by hand, though you can also use a pair of needle nose pliers too.
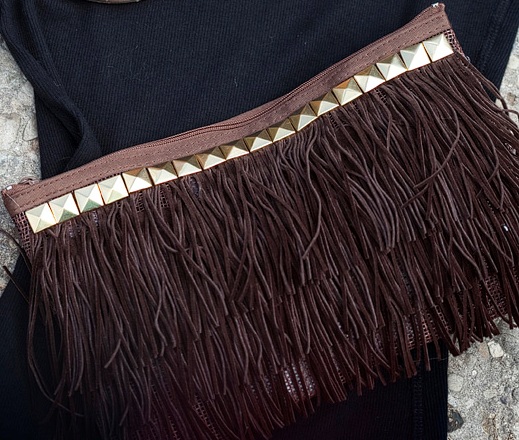
Continue to repeat the studding process, keeping the studs close to one another and aligned with the top of the pencil case, until you get all the way to the other edge.
Then enjoy your new rocker-chic studded fringe clutch! Fill it up with your purse essentials, or if you’re feeling particularly studious, perhaps some number 2 pencils!
Remember: Head over to NewYorkDesignShop to check out all of the bloggers’ designs and VOTE!
Other than my eternal gratitude, there’s something in it for you too: by voting for the DIY projects you like the best, you could win one of the winning bloggers’ creations, so head over and cast your vote!
(PS: Thanks to my BFF for taking pictures of my completed projects!)

